Friday, February 1, 2013

Love is in the Air Blog Hop 2/1


Hello everyone and Welcome to Love is in the Air Blog Hop!

Valentine’s Day has to be one of my favorite holidays next to Christmas and Thanksgiving. I love the décor, flowers, candy, balloons, and stuffed animals and let’s not forget the cheesy cards! Valentine’s Day is that one special day we can show extra love and appreciation to all of those special people we have in our lives. To celebrate Valentines Day, I have a group of talented designers that have created their own special project to showcase.

We hope you enjoy hopping away and as always we hope to inspire you!


Lluvia will be giving away a grand prize, all you have to do is comment on each of the designer’s blog! Winner will be picked on 2/5, please leave your email address!


 If you came from Amanda you are in the right direction!

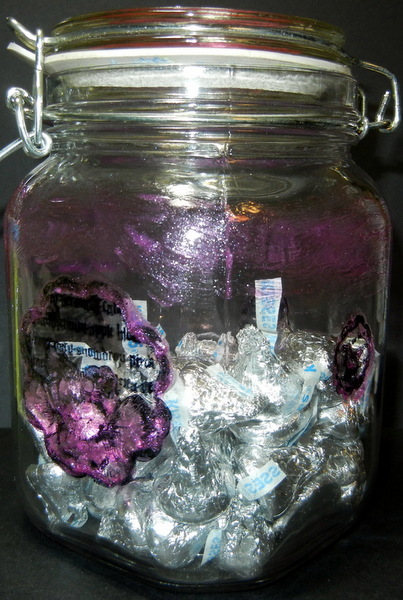
Duct Tape Flower

Isn't it cute?
My son needs a flower to give his "girlfriend."
He is only 12.
I thought this should do.

I had help with this gift. :)

Now on to Beth!


Line-Up:


Monday, January 28, 2013

Love is in the Air Blog Hop


Love is in the Air

My Life in Arts’ n Crafts’
Design Team Blog Hop

 Valentines Day is right around the corner, so we are getting ready, by showing our valentine creations. You should be coming from Tahi http://tahisscrapcorner.blogspot.com.

If not head on over to Jessi’s to get started.

I have used _jute twine and mesh ribbon__ from the My Life in Arts’ n Crafts’ store. 
 Jessi has some amazing new products over there, go take a look.

 Supplies:
Hershey's Nuggets
Tin with Clear front
The Robin's Nest Purple Flower Paper
(Both from the store!)


Directions:
Cut paper to fit around the candy and put inside the tins.
Then used the beautiful white mesh ribbon to tie around it to make it look much prettier.
Added some purple jute around the ribbon to show off more purple.
 
Simple project but great valentine gift.
Could also tie jute around each candy if you wanted.

Jessi is giving away some goodies from her store to one lucky person who comments on all the blogs in the hop as well as you must be a follower.

Extra entry if you like the My Life in Arts’ n Crafts’ fan page. Comment on My Life in Arts’ n Crafts’ telling her you’ve done so.

Extra entry , OMG that means you have three chances to win!! Once you’ve gotten through the hop, head back over to Jessi’s and comment again saying what product you’d like to win. So you might wanna check out the store and decide. One lucky person will win their choice. Make sure you leave a way to get in contact you.


Head on over to Angela http://creativecraftin.blogspot.com/'s
to keep getting more inspirations.

 Jessi


Sunday, January 20, 2013

Valentine Candy Tin - Sakura DT

Valentine Candy Tin - Sakura DT


It has been a while since I've been on my blog. A lot has been going on. Mostly the horrid flu has hit my house and had my son and I out of commission for 7 days!
Then when he was able to go back to school it was makeup work EVERY night, one night I had to help him study for 4 tests and somehow he pulled through with all A's.
Smart 12 year old. :)


Well I made this tin into a Valentine theme tin. I still need to buy the Hershey nugget candy and put "wrappers" around them to make it totally complete which I plan on doing closer to Valentine's Day and giving it to my son (he's 12) along with something else to give to his girlfriend even though he tried to tell me he wasn't giving her anything for a made up holiday. LOL.
Told him he better wait until marriage to try to pull that one.

This isn't the best picture. I tried to do it different ways to get the beauty of it but because the tin has a clear cover there is a glare that makes it look like there are double hearts in the picture and I took it without a flash. I even put paper in the bottom but I hope you get the general idea.

It really is beautiful in person.
And can't wait til I put the candy in there as well.

Supplies:

Tin with a clear window

 3D Crystal Lacquer - Primary Colors
(These are awesome!)

Tear Drops by The Robin's Nest
Helmar Quick Dry Glue

Directions:

1. Take the red and draw a heart with it. The 3D Lacquer colors are so easy to use and can use them like a pen to draw out your creation. Then fill it in slowly or else on the "film" of the tin it wants to run.

2. Then get various colors and draw squiggly lines next to it.

3. Follow up with putting some Helmar glue on tear drops and put them on the squiggly lines for great accents.

4. To really finish it off you can then cover up Hershey nuggets and put them in the tin.

I can't wait to try the set on glass. The effect it gives looks so neat in person. But be sure if you want to use more than one color close to each other that you allow the first one to dry.

Thank you for visiting!
Jamie


Saturday, January 5, 2013

Birthday/Address Chipboard Book

Birthday/Address Chipboard Book

using
and we have teamed up this month
with
I decided since I've long lost my birthday book that I would use the new card and tag kits that The Robin's Nest has come out with and make a new one of my own.
Then to add to the chipboard book an address section so I would know who to address my cards to each month. It's not an address book made for everyone and everything, just people I would send cards to so that it will all be in one place.
This Month The Robin's Nest is having a SALE on their card and tag kits!
Click here to see them: Card and Tag kits! and Here!
Use Code: cardkitpromo to get 20% off!

Also be sure to look all through the design team blog to see how the kits were/are used to make cards, layouts, and altered items throughout the month!

Supplies:
Birthday Boy Card Kit
Outdoors Tag Kit
Heartfelt Creations - Daisy Patch
 (includes matching stamps to purchase with the dies)
Crop-a-dile
Chipboard Album
Helmar Glue

Here are pictures of my supplies and how the inside turned out as well:
 Birthday Boy Card Kit
Outdoor Tag Kit
Chipboard (bought it for 50 cents on clearance!!)
 These were from the card kit.
I put the clips on them and put two months on the front and two months on the back. There were 3 cards total!
I punched a hole in them with the crop-a-dile after figuring out how I wanted them lined up with the front of the birthday/address book.
Then I made this piece. I used an envelope from the card kit and adhered it to one of the chipboard pieces. Also used stickers from the tag set to decorate around all the edges so they would be covered.
Inside the envelope I put all the tags so you can put addresses on them.
The tags only need addresses to those you are sending cards to and amazingly even though they just look like distressed pieces of cardstock they aren't. 
The tags are actually made of chipboard.


Fun Fact: All the glittered paper from The Robin's Nest is hand glittered! :) Neat huh?

Thanks for visiting,
Jamie 
http://www.jamielindstromdesigns.com 


Sunday, December 23, 2012

Advent Boxes - The Robin's Nest

Advent Boxes


They have a 25 slot shelf-like thing they go into but it didn't make it here in time. I'm guessing me ordering it late and the fact a lot were ordering it for the same reason didn't help.
 
So instead of showing it all neatly set up I thought I would at least show you the cute boxes I made.
 
Two of the boxes weren't decorated because I couldn't find my adhesive to continue with the dew drops since we are still renovating and moving rooms upstairs. :(
 
You can find the fabulous paper, clippies and dew drops at:
also be sure to check out the Fabulous Blog:
 
Supplies:
CTMH Artiste Cartridge
Adhesive
 
These are very simple to cut out and then put together and add on the dew drops and/or clippies.
They also have great space in them to put whatever kind of advent treat you would like.
 
Thanks for visiting,


Tuesday, December 11, 2012

Medieval Barter - School Project

Medieval Barter - School Project

Well I found out how great Amazing Mold Putty is for school projects this past week.
And will be using it again this weekend for another one.
I find so many uses that I never thought of before especially now that I have their silver powder.

My son was studying medieval times in his 6th grade Social Studies class.
They had to come up with 3 items to barter with and he had good ideas but was having trouble putting them into place such as how to make the items and such.
He even picked up premade items and the whole assignment was they had to be handmade.
I emailed asking if we could use molds and resin and she said that even though resin may have not been during that time she is sure they made molds out of soap and candles so we went to work.

Since it was his project I had him help out as much as possible.

He decided on two keys and a horse shoe.
I had two keys from my scrapbook stuff so I decided he could make a mold of them even though I had done it myself before. I wanted to show him how to do it all himself and how easy it was. And I bought a cheap set of "cowboy" ornaments that had a mini horseshoe that we used for the third item/mold.

Supplies:
1. He mixed equal amounts of the yellow with the white putty and then pressed the shapes into them.
2. Then let the molds sit for about 30 minutes and dusted the molds with silver metallic allumilite powder. He used a really cheap paint brush to do that.
(I thought he did a pretty good job!)

This part I mixed for him since my first time I was sloppy and made messes on surfaces that are messed up forever. Totally my fault.
I mixed equal parts of A and B. 
But first I took part A and put some of the metallic powder and mixed it in so the resin would also be metallic colored throughout it and mixed well, then poured both parts into a paper cup.
After that I showed him how to as neatly as possible pour into the actual molds.
Then we waited a while since we had a mess to clean and a few other things to do.

Here is a picture of the original horseshoe with the new one.
They look VERY close, don't they?
The left one was the one made with the mold and the right one was the original!

This weekend we plan on making some Disney themed molds after I find all my Disney trinkets for his next project!

Thanks for visiting!

Also the main product page has a video that also shows you how to use the product!
Also check out the blog for great ideas: Amazing Mold Putty

Sunday, December 9, 2012

Christmas Card - The Robin's Nest

Christmas Card
 
This year I haven't made much in the terms of Christmas cards, too busy getting life to feel normal now that my son has moved out and is getting married two days before Christmas.
 
Christmas cards this year will be far few and in between but when made they are made with all the love inside of me. :)
 
The Robin's Nest really does have some of the best stuff to make Christmas cards with in my opinion.
Especially the different shapes of dew drops and such.
 
 
Supplies:
ScraPerfect Best Glue Ever
CTMH Art Philosophy Cartridge
 
Directions:
1. Cut a 6 inch scalloped card and fold to the side of paper you want seen.
 
2. Cut a 5 inch scallop card and cut in half and flip over and glue the other side to it.
 
3. Cut out the layer tree on the green cardstock. It will leave holes so you know where to put dew drops at on it. Adhere it to the card.
 
4. Pick out the dew drops you want and glue on the areas that have holes to cover them and make a tree topping.
 
Thanks for visiting and be sure to check out their blog: Chattering Robin's


Sunday, December 2, 2012

Candy Jar - Sakura DT and Sin City Scraps Stamps

Candy Jar
 
I decided to make a candy jar since my first one was smaller and it fell once in a spot and wasn't found for months and by then the candy was icky.
 
I decided to use Sin City Scraps Stamps (we teamed up with them this month! :) on it as well as Sakura Craft Products!
 
 It's all done in pink because my new room will be grey, drab like green, and airforce plane border.
I'm taking over my son's old bedroom as my studio and after already painting 2 rooms in the house to suit my color needs I decided this time I will just add pictures and other decorations to add color to the room and leave the paint for once. Especially because it fits the fact I served a very short time in the Air Force National Guard before a medical condition came up.
 
After I move to the room and hang pictures up I plan on adding ribbon to areas of the jar that I can tie them onto but not until the BIG move.
 
Supplies:
Stazon - Jet Black Ink
Paint Brush
Wax Paper
Jar with a lid

Directions:
1.Stamp the jar with stamps that have been stuck in stazon ink so it will stay permanently.
(It's hard to keep these from slipping on my jar so took me a few times.)

2.Give a few minutes to dry.

3.Mix Sakura 3D Crystal Lacquer with a small amount of Shimmer Rose jewel effects mixer on wax paper and paint it onto the stamped images wherever you like. I did the flowers, butterflies and the outline of the stamps.

I also painted the top part of the jar pink since I had so much of the shimmer mixer left and loved the shimmery look!

Hope you were inspired and thanks for looking,


Saturday, December 1, 2012

Winter Wonderland 12/1

Welcome to the Winter Wonderland Blog Hop!
 
 
Brought to you by the Krazy Crafting Crew, our last hop of the year saying goodbye to the old and in with the new. Next year will get even better with more specific projects and themes, to share with you!
 
What a beautiful time of year it is for most of us, and a great time to craft!
Today we will be hopping through many different winter projects!
If you have arrived from http://cardmonkeyspaperjungle.com  are in the right place! If you have just stumbled upon the hop, please start with our hostess at So Many Crafts So Little Time . 
So you don't miss a thing!
 
Don’t forget to check out the blog candy throughout the hop to and read the rules for each one as every blog has different requirements. Your host Lissa Marie is giving out a mini calendar to those who are followers of her blog (confirmation is required or she won’t see that you have signed up if you are new) She will make it just for you to help you schedule your appointments or if you are a blogger you can schedule all your hops all right next to your monitor! All you have to do is tell her your favorite colors!
Another great reason to comment so you can also win with


Our sponsor, Scrapbook Stamp Society
(http://scrapbookstampsociety.com/)
 
They would love to reward one special blog visitor with a prize from their store. To be qualified for their drawing, please comment on all participating blogs and let them know you have.

You can receive extra entries for following them on Facebook at https://www.facebook.com/groups/205539419562521/
and for commenting on the Scrapbook Stamp Society blog http://addicted-to-stamps.blogspot.com/).

 
Supplies:
CTMH Holiday Trinkets (Stamp)
Sassy Studio Designs Digi Stamp
The Robin's Nest Cardstock
Copic Markers
Tim Holtz Distress Ink - evergreen bough

Thank you for taking the time out to check out my projects, you are encouraged to keep clicking for more Winter Wonderland.
Your next stop is http://tryin2craft.blogspot.com .
Thanks so much for hopping through our Winter Wonderland!
 
Here is the full line up in case you need to navigate

You’re Host Lissa Marie ~ www.somanycrafts.com


Monday, November 26, 2012

Christmas Card - The Robin's Nest

Welcome to the Christmas Card made with 


Papers

and 

Fabulous Dew Drops!

And be sure to check out their blog to see what others have made as well! :)


Supplies:
(also known as glitter vanilla wedding)
CTMH Christmas Stamps (Heartfelt Christmas)
Tim Holtz Distress Ink - evergreen bough, iced spruce
DCWV Card

Thanks for visiting!